My mother decided to keep her Christmas tree a bit longer and made it a Valentine’s Tree and now an Easter tree.
(We listen and we don’t judge.)
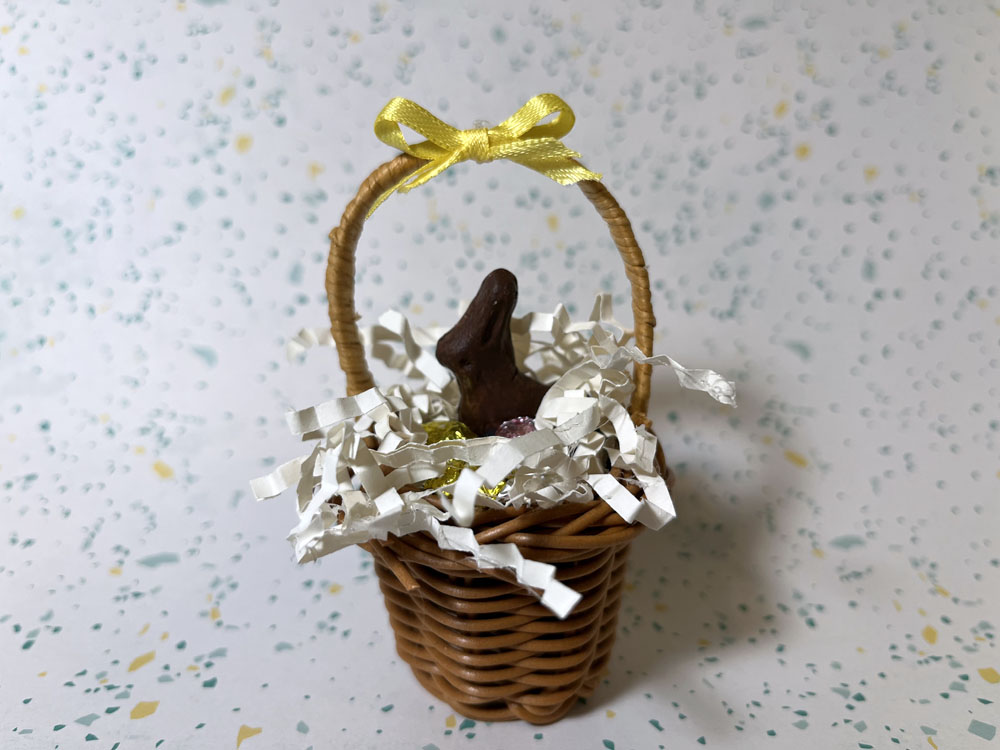
Naturally, this called for new ornaments. While Nephews A and B contributed their masterpieces, I decided to try something a little different: miniature Easter baskets, complete with tiny chocolate bunnies and foil-wrapped eggs.
Had I ever done anything like this before? NO. But the older I get the less daunted I am by trying new crafty things. I started out with a sketch.
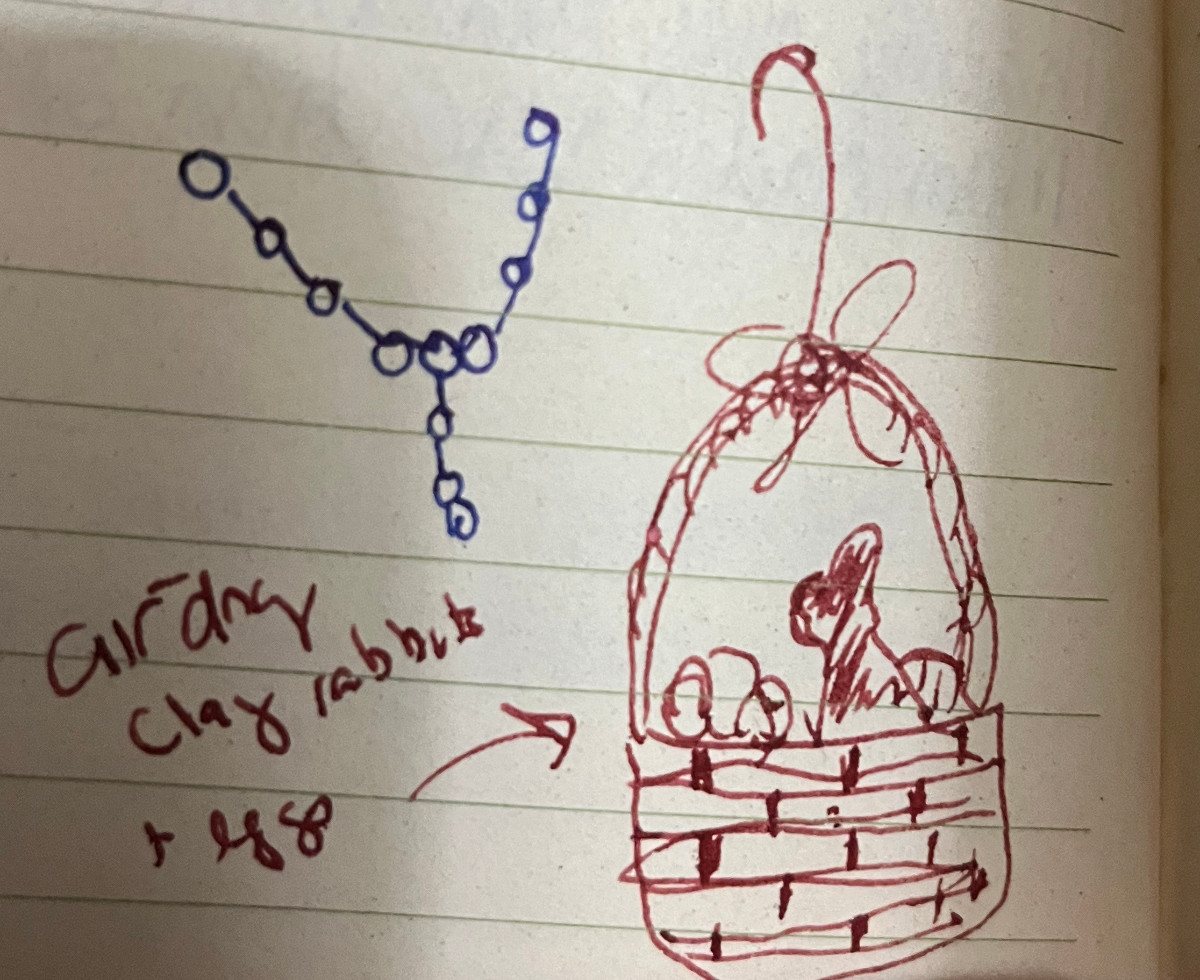
The vision: small brown baskets, each with a chocolate bunny and a few foil wrapped eggs. While I had worked with polymer clay before to make my ghost decorations, I was brand new to the world of air-dry clay. But I watched a few TikToks, so how difficult could it be? I ordered a one-pound brick of clay and six tiny baskets and got to work.
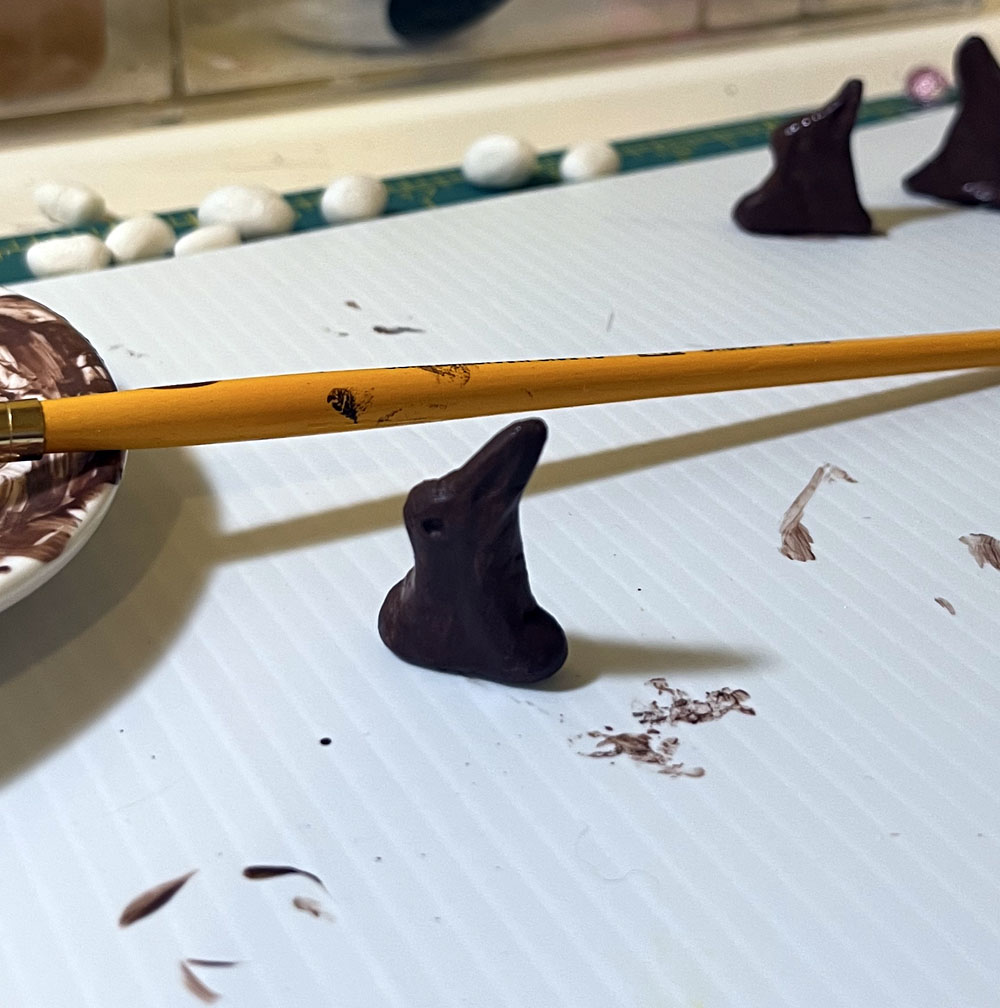
My first step was sculpting the bunnies and eggs. Once I had the baskets in hand, I could figure out how large the bunnies should be. I went with about 3/4 inch for the bunnies.. Using the classic chocolate Easter bunny for inspiration, I sculpted each one by hand and used a dotting tool to add an eye and carve the indentation in the ear. I aimed for eggs about half the size of the bunny. They probably should have been smaller but I didn’t want them disappearing into the basket. I made seven rabbits and 20 eggs for six baskets. Always make extra.

I let them dry for 24 hours during which the color transformed from gray to white. After drying, I sanded the bunnies so that were smooth and could stand up on their own. I skipped sanding the eggs since I planned to wrap them in foil.
Next, I painted the rabbits with brown acrylic paint and they turned out really nicely! A quick swipe with a brown marker took care of any spots I missed. After letting them dry for a full day, I applied Mod Podge to seal everything in.
For the eggs, I knew I wanted colorful foil but wasn’t sure how to make the color stick. I tested my Ohuhu alcohol markers on the foil and by the next day the color was dry and held beautifully. If I did this again, I might paint some of the eggs brown and add candy details to them with an acrylic paint marker.
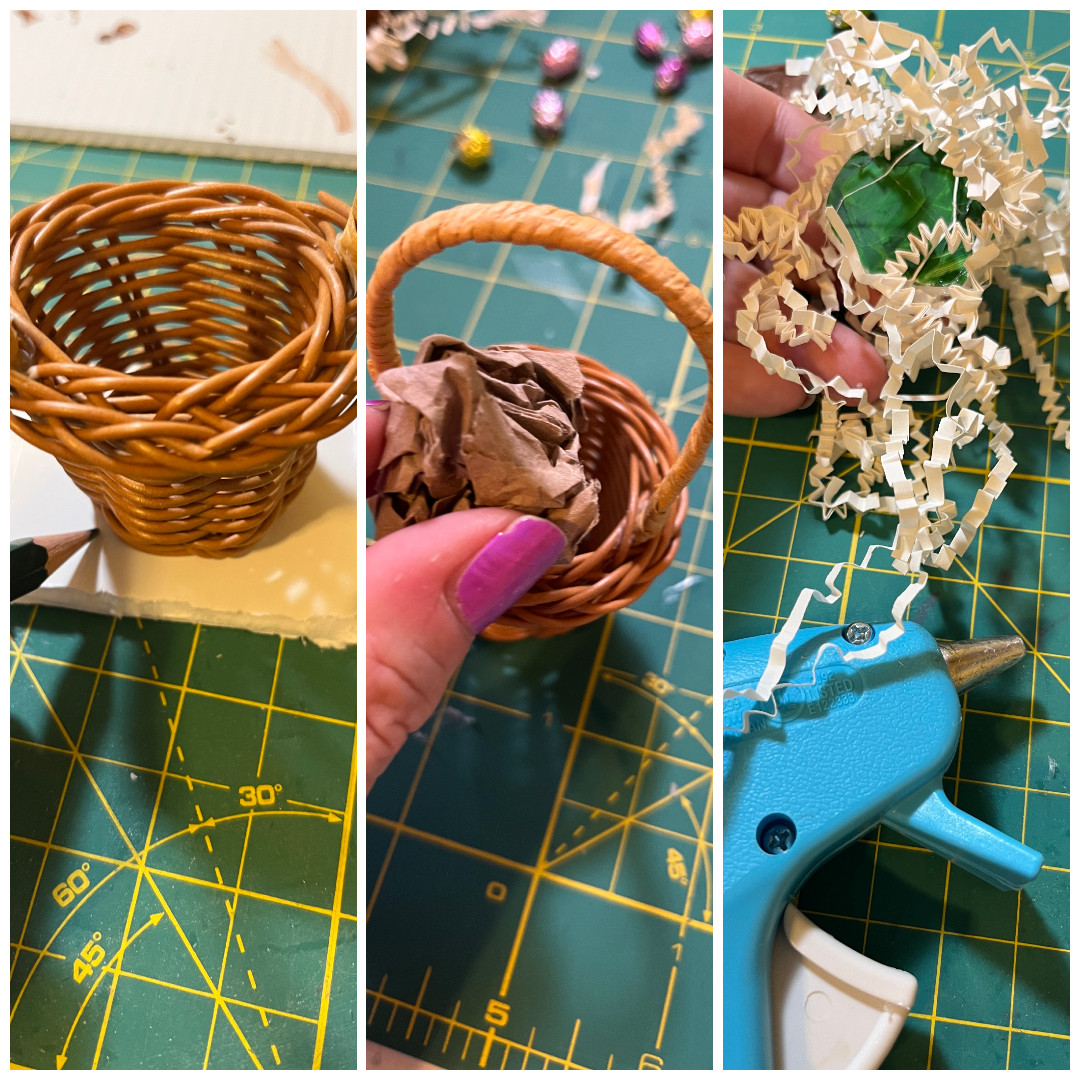
The next challenge was creating a raised base inside of the basket to hold everything in place. I traced the bottom of the baskets onto foamcore (although any thick cardboard would work), cut out those roundish shapes and colored them green.
To keep the bases from sinking, I wadded up some brown packing paper and tucked it underneath. At that point, I realized I needed Easter grass. An Etsy purchase from a few weeks prior arrived in box full of cream colored shredded paper. Bingo. I glued that to the edges of the bases. Tip: use more than you think you need, you can always trim it down later. Once dry, I pressed the bases into the baskets.
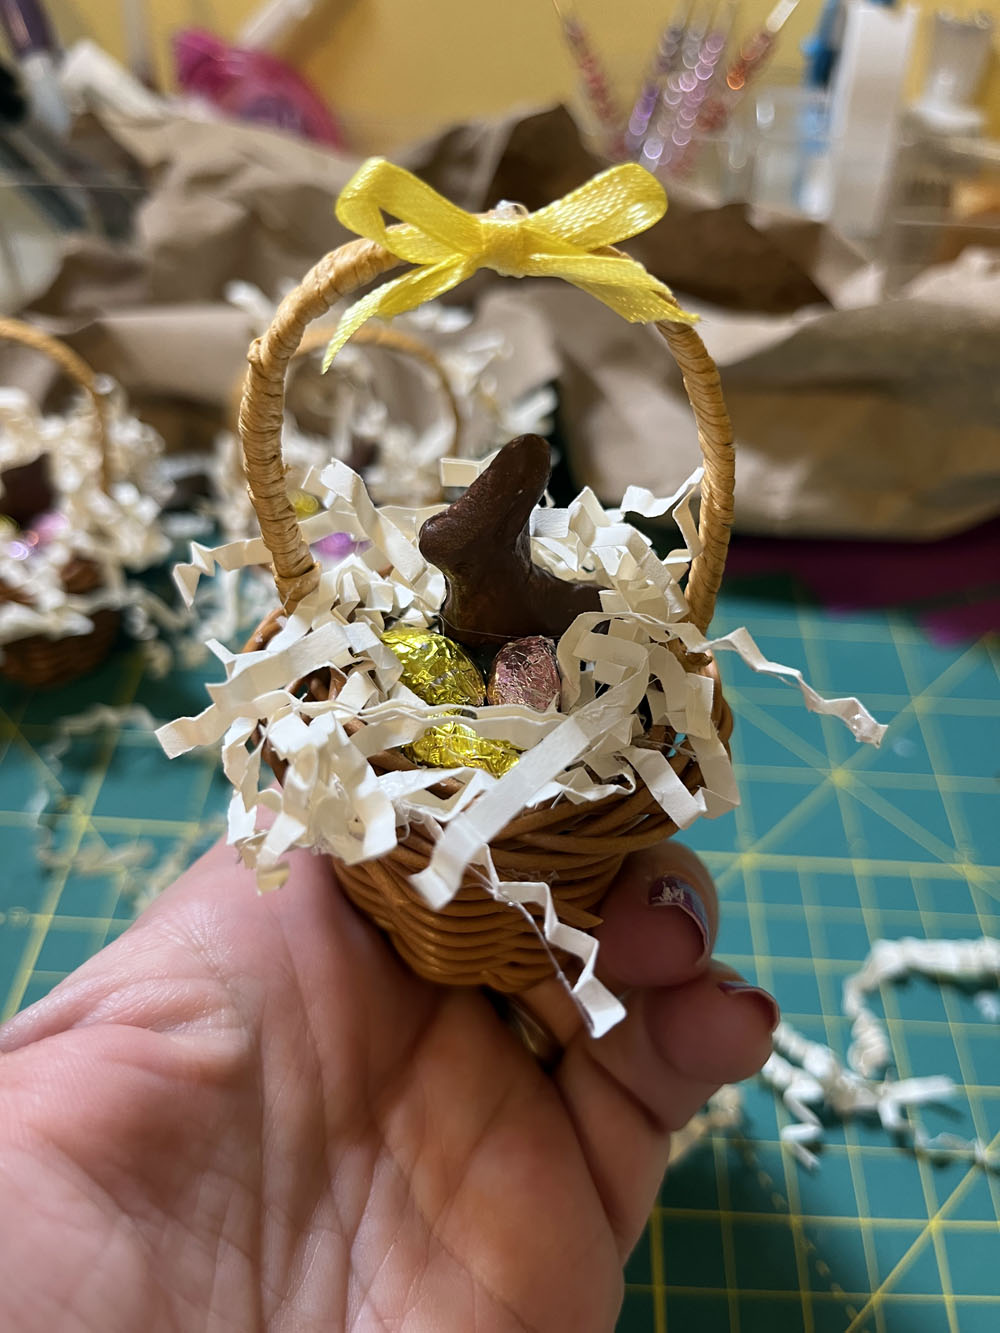
From there, everything came came together quickly. I wrapped the eggs in the colored foil, and glued three eggs and one bunny onto each base.I had some 1/8″ yellow ribbon on hand, so I tied tiny bows and glued them to the basket handles. Definitely the fussiest part of the entire project.
Finally, I trimmed the slightly chaotic grass down until it looked presentable and the baskets were done.
This project took me two weekends. The first weekend was for sculpting (Saturday) and painting (Sunday). The second weekend was for sealing, building the bases, and assembling.
They turned out so cute. Mom SQUEALED when I gave them to her, and they look adorable on the Easter tree. I kept the extra rabbit and eggs for my craft room shelf, because of course I did.
The candy looks real but it’s clay, so keep these away from small children and impulsive adults.
I linked all the supplies I used listed here on Benable. Purchasing from there gives me a little bit of affiliate income at no cost to you!
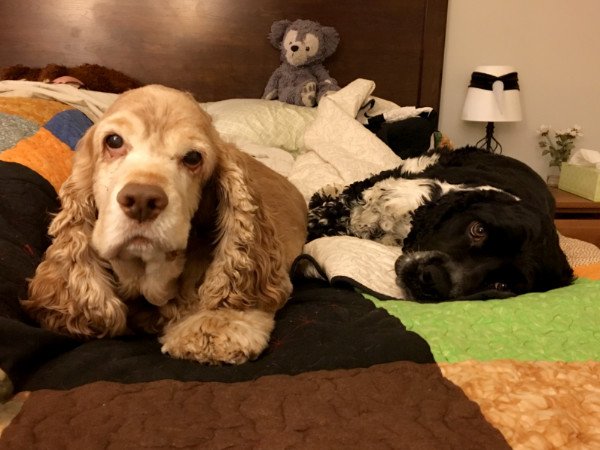
No word yet on Murphy’s X-rays. The vet filled another round of his anti-nausea pill yesterday and not only did he keep everything in, but he slept an entire night.

Sooo cute! 🐰