In the vein of “the cobbler’s children have no shoes,” I do not have handmade birthday cards on hand. I do have some store-bought cards because I am a Woman of a Certain Age. But wouldn’t it be nice to have a handmade one? How about two?
I had some vellum in my stash that I had never used because I bought it and was immediately intimidated by it. Vellum is a smooth, translucent paper. Rather than go crazy, I decided to use it over some patterned paper on the card font. This would immediately give the card a softer, frosted look.
Last year I did a fantastic job of sticking to the paper, stamps, and dies that I already owned. This year is less than two (harrowing) months old and already I undid any financial gain from last year. At least I used gift cards for most of it.
All of that to say I purchased a $35 book of paper from Barnes and Noble. It’s called Paper Paper Paper: The Opulent Edition and it’s 50% paper I can use for cards and crafts and 50% stickers and postcard and wrapping paper. It’s highly impractical and the designs and colors are rich and dark and not my usual style at all. I bought it anyway.
There was a cardstock page in the book with a black and gray Art Deco pattern that was heavy enough to be a card front. I trimmed it to 4 1/4 inches by 5 1/2 inches, which is a standard A2 card. I cut a piece of vellum to be 1/4″ shorter on each side, and delicately glued it down. You have to have either a really light touch or a strategic touch because the glue will show through the vellum.
I embossed HAPPY BIRTHDAY in silver on black cardstock and glued it to the front of the vellum. The card looked nice, but it didn’t look finished.
Leaning into the Gatsby-esque theme, I pulled out some small gems that are part of a nail art kit I was given for Christmas. I glued five of them to the vellum, and that was the finished card!
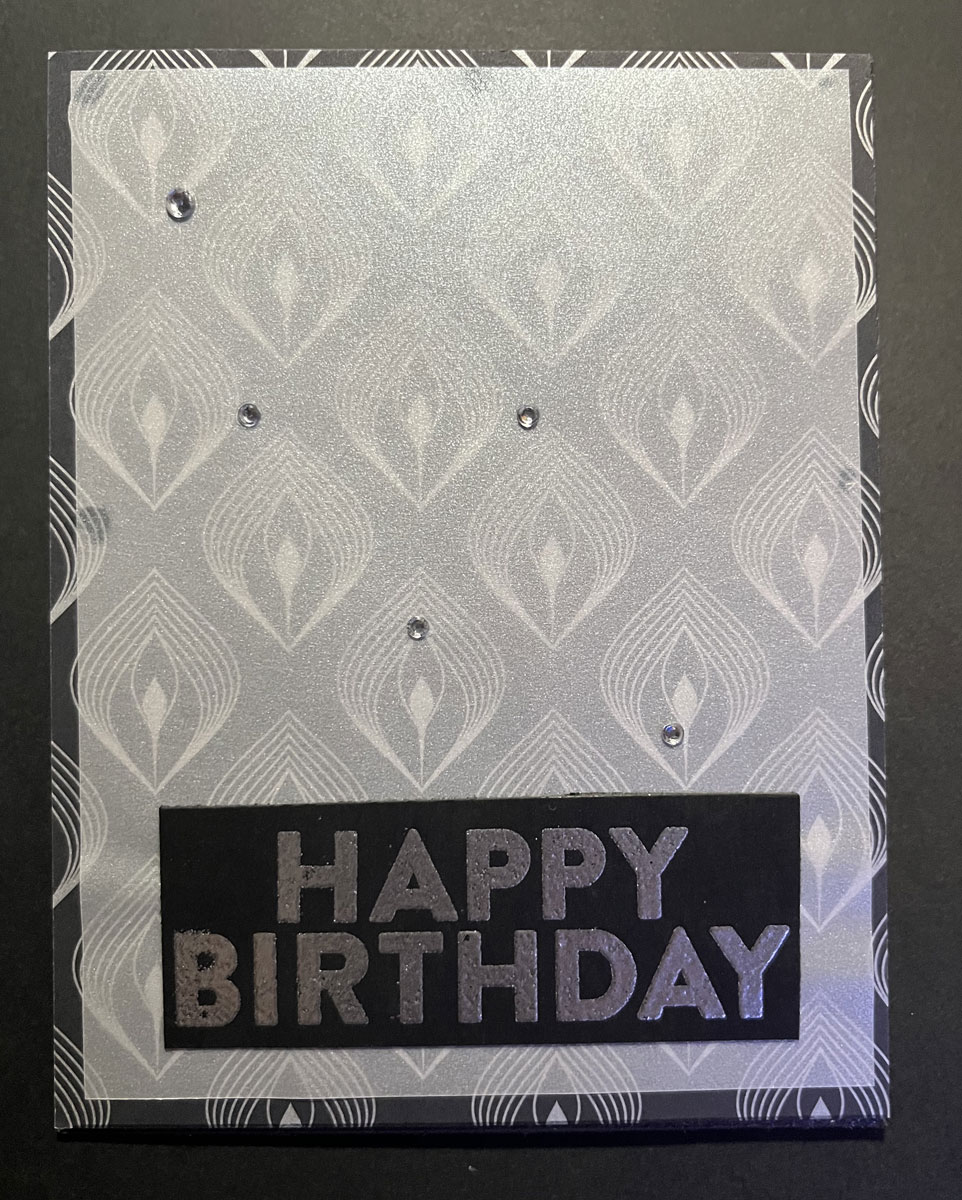
If you look for it, you can see the glue along the vellum border. Next time I will glue the elements to the vellum first, and then dot adhesive behind those elements to better hide where I’m attaching it.
So smug was I that I decided to do it again.
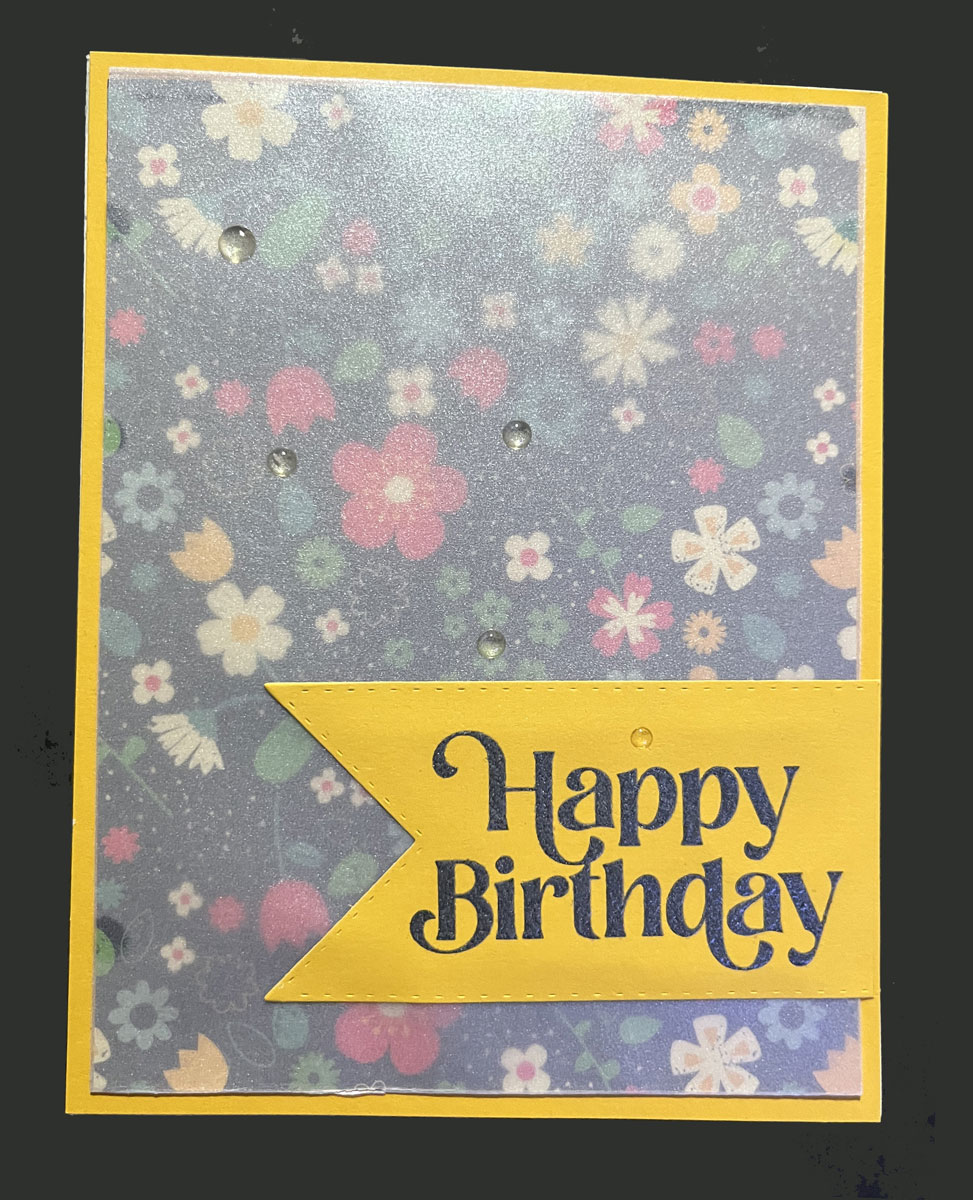
I found a very busy floral patterned paper in one of my old paper pads. This time I cut a yellow piece of cardstock for the 4 1/4″ x 5 1/2″ panel and trimmed the patterned paper to be 1/4″ less on each side. Then I tried to be clever and cut the vellum the same width as the patterned paper but longer, so I could fold the top and bottom edges over the patterned paper and glue them to the back.
I wasn’t convinced that was enough to secure it, and not having had the above “hide the glue behind the elements” epiphany quite yet, I dotted it down the edges as well.
This time I stamped Happy Birthday in black on the same yellow cardstock as the background, and heat embossed it with clear powder. The clear embossing gave the black sentiment a slightly frosted look which matched the vellum nicely. I added some embellishments that looked like raindrops to the front and called it good.
Wrap-Up
The more I work with cards, the more comfortable I am with trying new techniques and materials. I did make a bunch of super-fussy cards for Valentine’s Day but I’m waiting a little longer to be sure that they were received before sharing them.
If you want to see the cardmaking tools and supplies I reach for most often, I’ve collected them in one place on Benable. Some of them are affiliate links, which means I may earn a small commission at no additional cost to you.